Tuesday, August 2, 2011

Olive Leaf Stencil Giveaway

Two posts in one day?? Hey, when something good comes a long, I am a firm believer in sharing! The always fabulous Mustard Ceiling has an amazing giveaway going on right now with Olive Leaf Stencils. Talk about a dream team, huh? Anyway, together they will be gifting a lucky winner their choice of an OLS stencil! Just visit the site and pick your favorite design, then by sure to let The Mustard Ceiling know by leaving a comment.

I think I would have to go with an Ikat pattern since I have been loving the design lately and already have about a bizzilion DIY ideas, like pillows, curtains, artwork, etc. However, a guilty pleasure of mine is mentally designing my future kids bedrooms. Am I alone here? Yes? (Well, that’s embarrassing!) Anyway, keeping it real, I just love the Jellyfish or Octopus for a boy’s room and the Chrysanthemum No. 1 for a girl’s room. 

Ikat No. 4

Jellyfish
Octopus
Chrysanthemum No. 1
What stencil would you choose and what would you do with it? Let me know and be sure to enter over at Mustard Ceiling (tell her I sent you!)


Pinterest Challenge Reveal


 When Young House Love and Bower Power released the Pinterest Challenge last week and opened it up to all their readers, I was so excited to get started! As a newbie to the blogging world, (long time reader, short time writer) I didn’t want to disappoint, so I got straight to work. 

When I announced the challenge, I gave a sneak peek into the two inspirations I was going to pick from. Both lamp shade ideas, one made of coffee filters and the other made of wax paper! In all honesty, the deciding factor came down to what I had on hand.  

Note: I am not exactly the most patient person and crafting is no different, when I am ready to go, I am ready to go NOW! 

Capiz Chandelier made from wax paper (via pinterest)

coffee filter light pendant (via pinterest)
Want to know what I choose, how I did it, and how it turned out? Drum Roll please….

My finished product! 
Having more filters than wax paper on hand made the choice easy and the coffee filter lamp had won! I cannot tell you how easy this project was to make, just a few simple items and some extra time in front of the TV and before you know it, you have a great new lamp.

Materials Needed:
Paper Lantern in your choice of size (I already had one hanging from our floor lamp that was in need of some serious TLC), coffee filters (the number of filters you need will depend on the size of your shade, I used about 400) Glue gun, and glue sticks.

Floor lamp before filters (The lamp was bought from Target about 4 yrs ago)

Coffee filters and glue gun (my new one is cordless!!!!)
Step by Step ooh baby Tutorial:
(you caught me, I was just singing New Kids on the Block while I typed that…don’t judge me!)

Step 1. Gather the filter at the bottom and squeeze.

Do a few filters a time and set them off to the side, it will make your life easier when your ready to glue!

Step 2. Apply a generous amount of glue to the paper lantern in small to medium square sections, then take the folded filters and apply the base of the filter to the lantern.
I wanted my lamp shade very full, so I really packed the filters in tightly.
Step 3 there are no more steps! It really was that easy and now you are ready to hang that beaut, step back and admire your work.

A good start, about one hour in.

It took me about 3 hours to complete, start to finish. I only know this because I was able to catch up on the first three episodes of Design Star on demand!
 Total Cost: $19.17 (an emergency back-up of filters & a desperately needed new glue gun)

I am so happy with how this turned out! Thanks to Sherry and Katie for giving me the swift kick in the pants to stop pinning and start doing! We should do this more often. 

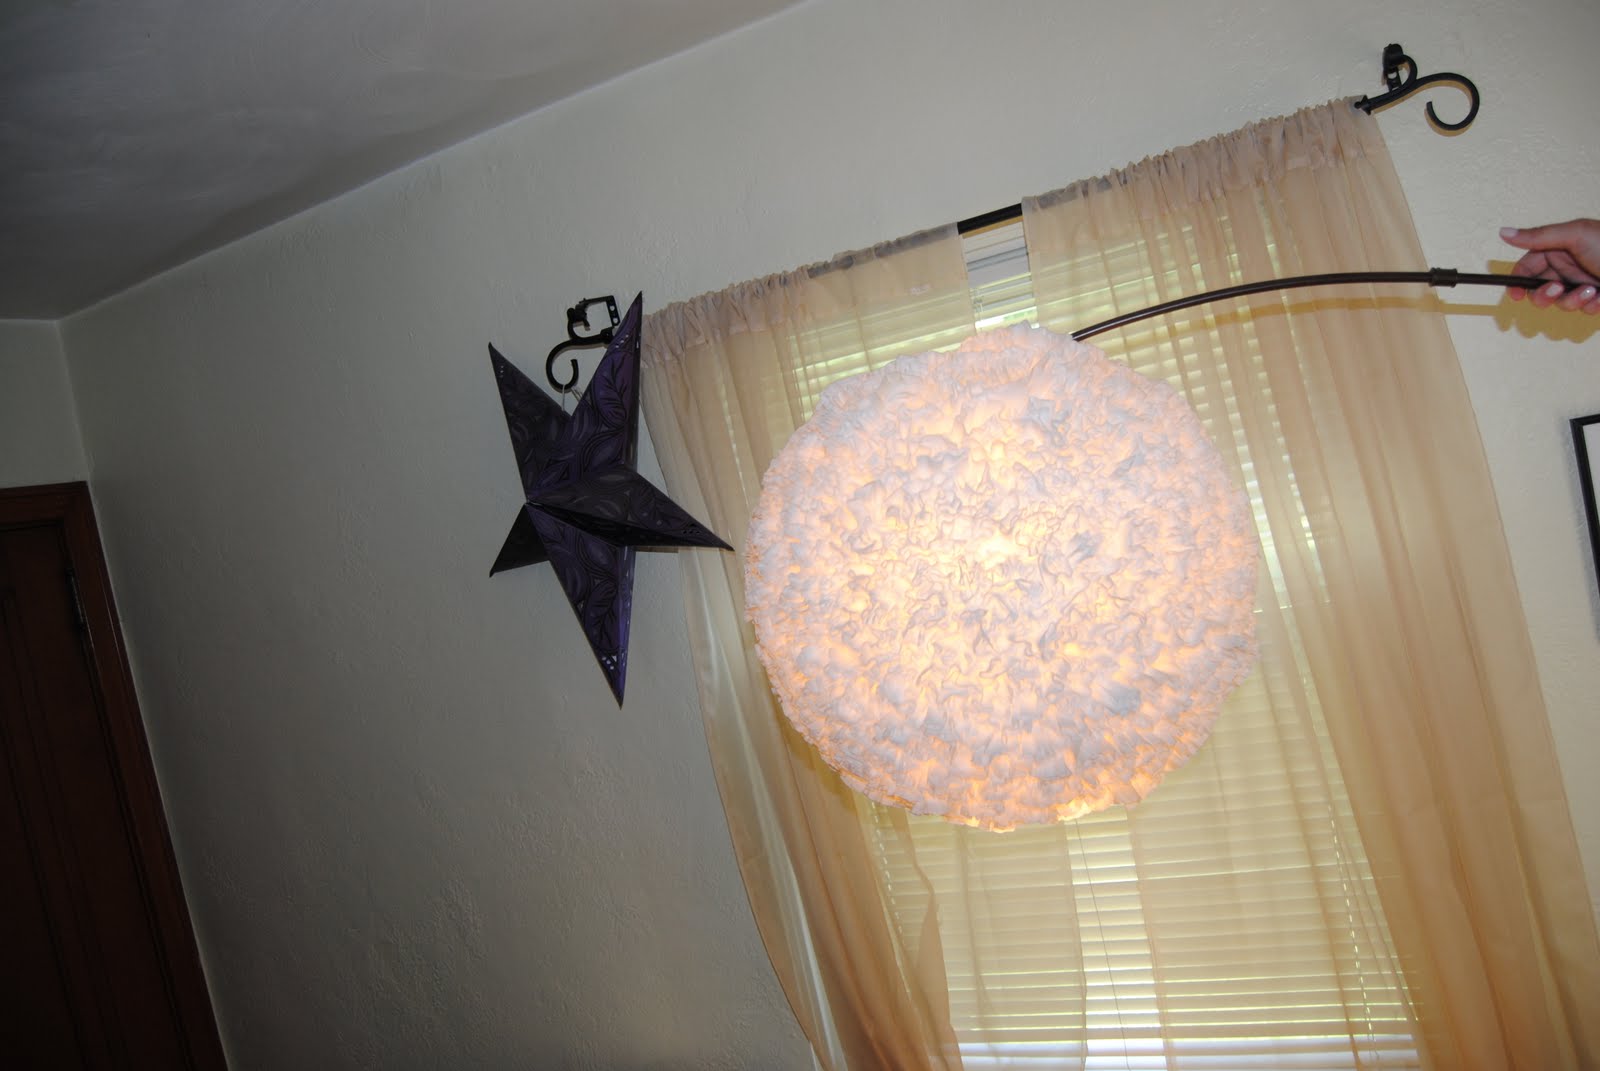
Finished lamp with the light on- I love the glow it gives off now!

Detail of the the finished product.
Did you take part in the Pinterest Challenge? If so, I would love to see and if not, it is never too late! Pick an inspiration picture of a craft that you have been meaning to accomplish and get going. Be sure to share your creations!


Monday, August 1, 2011

Tackling the Dining Room

One item on my summer to do list was tackling our neglected dining room. If you can even call it a room, more like a square hall way or large closet more closely describes the space. We have been renting our current house for just over a year, and in that time the DR was pretty empty besides a tiny IKEA table and two chairs (from my college years) and the bar/island that my dad made. 

Moving Day July 2010: Table/chairs by the window and the bar on the opposite wall
July 2011: Bar by the window and the table/chairs on the opposite wall (phone pics=bad)

Not much difference from the empty room to the furnished room, huh? Although I knew it would never be the site of a dinner party or Thanksgiving dinner, I was tired of looking at the lonely room everyday. I started to browse the mighty Craigslist and see what was available at the price point I was willing to spend-CHEAP. I didn’t exactly know what I was looking for but hoped I could find something to build around.

After a few days of searching (and losing out on a few things) I came across a posting for antique chairs from a local historial Inn. I immediately fell for the deep olive upholstery and the dark carved wooden frames. The listing asked for 40 bucks a piece but after talking to the delightful owner, Arlene, we negotiated the price down to $125 for all four chairs!

So, I dragged my hubby into the car on Saturday evening and off we went. The chairs were much taller than I expected but actually made me love them even more, except I grew skeptic that they would fit in our small SUV! After some finagling, we got all four chairs in...SUCCESS! Arlene’s husband commented that the Hubs and I must be really great at puzzles since we got them to fit so “easily” (My father would be very proud to hear that he has taught us the master skill of car packing!)

Our IKEA table is small and only fits two chairs, but it worked out since there isn’t much room for all four around a table anyway. We added the extra two chairs flanking the bar, which works nicely. Then I added in some accessories, scored new dinnerware at Marshalls on the cheap (under $12 a setting) and the room is really starting to take shape! Next up, I want to add a picture gallery on either wall above the table and maybe repaint the chairs (thoughts?)

The table cloth is actually a vintage bed sheet that I found at a flea market for a few bucks, folded and draped over the table. I couldn't find a table cloth that covered the entire table but wasn't long on the sides that the chairs go under.     This linen seems to do the trick!
 
Table setting with my new dinnerware and serving bowl from Marshalls
The bar centered under the window with the two extra chairs.
Again, it is never going to be a space for entertaining large dinner parties, but at least it now has some character and function. Do you have a room in your house that was too small or awkward, but figured out how to make it work? Let me know, I would love to hear all about it.

*Don’t forget to tune in tomorrow for the reveal of my Pinterest Challenge craft!


Friday, July 29, 2011

In my life, I loved you more

 As I mentioned in my  post yesterday, today is the three month anniversary of our fabulous wedding! 
 Is it weird to celebrate months of marriage? Yes, but I have an excuse...at least enough of one that works for me. The hubs and I dated for close to 6 years before we tied the knot, yet never had an actual anniversary. We never decided on a specific day that we were going to be exclusive, it just kind of happened naturally, so now that we have a real date, it's exciting. (I never said it was a good excuse, just an excuse.)
Our escort cards- attached to vintage skeleton keys

Wedding date in roman numerals...mMm, cant wait to eat that baby in 9 months!
 Anyway...Happy three months (and 6 years- since as the hubs complains that 3 month sounds like we just met and that he has "served under me" much longer and deserves that recognition) to my partner in crime who puts up with my craziness and some how keeps me grounded while always supporting my wild aspirations! Marrying you was the smartest thing I ever did <3


Thursday, July 28, 2011

Lists and Challenges...Oh My!


Lists and challenges, I have a love of both, so it was a welcoming coincidence that the same day I promised to share my Summer DIY To Do list with you, I came across a DIY challenge! Two of my very favorite design bloggers, Sherry at Young House Love and Katie at Bower Power, posted a Pinterest Challenge on Tuesday where you have one week to stop pinning and start doing! 

Although I am new to Pinterest, I had my “to do” list written and was up for the challenge! I quickly got to pinning (anyone know a good Pinterest Anonymous group? I may need it) and have two projects in the running. Although Sherry and Katie (and the amazing Emily Henderson of HGTV, who is also taking the challenge) are not disclosing their DIY craft of choice, I am…in a minute.

First, let me share my “Just do it already” list!

As the "projects" are tackled, I will share with you more details of each!

OK, back to the Pinterest Challenge (my adrenaline rushes every time I say the word CHALLENGE!) If you notice in the list above, there is a good amount of light fixtures listed. Maybe it is because I can't stand to look at the “boob” lights in our bedroom and office any more or maybe it’s because I keep coming across great tutorials. Either way, I have narrowed down my craft to one of these two beauts:

via

This might win because it reminds me of my DIY wedding decorations (pictures below!) and since our 3 month anniversary is tomorrow, seems fitting to tackle this now. 


However, the capiz chandy below is a close runner up because it's extremely intriguing to me. Will the wax paper really look like capiz shells? I would most likely follow the third pic because a.) A sewing machine is currently foreign to me (didn't you see the last thing on my to-do list?) and b.) I am impatient and this way seems quickest!

via via via

Want to know which project I choose?? Check back on Tuesday for the big reveal and my (hopefully successful) tutorial. Do you want to join in on the fun? Read and watch all about it here and be sure to share your creations with me.

I am off to the craft store! I will wait until tomorrow because a HUGE storm is here and now our power is out and the car alarm is beeping...crafting will have to wait!